Convert Hand-drawn sketches to Scalable Vector images
I've never written a tutorial before. But I figured I would give it a try after I taught myself a decent method on how to take something I sketched on paper and turn it into a very clean, scalable, vector based, image in Photoshop. I'm using Photoshop CS2, but I'm sure a few generations back would work just as well. All you really need to make sure you have is the PEN tool. The only other tools you will need are going to be a piece of paper, a pen or pencil, and a scanner (which now a days is pretty common). The reason I wanted to do this is because I find it much easier to draw something quickly on paper and then clean it up on the computer than it is to draw it completely on my computer. Let's get started, shall we?
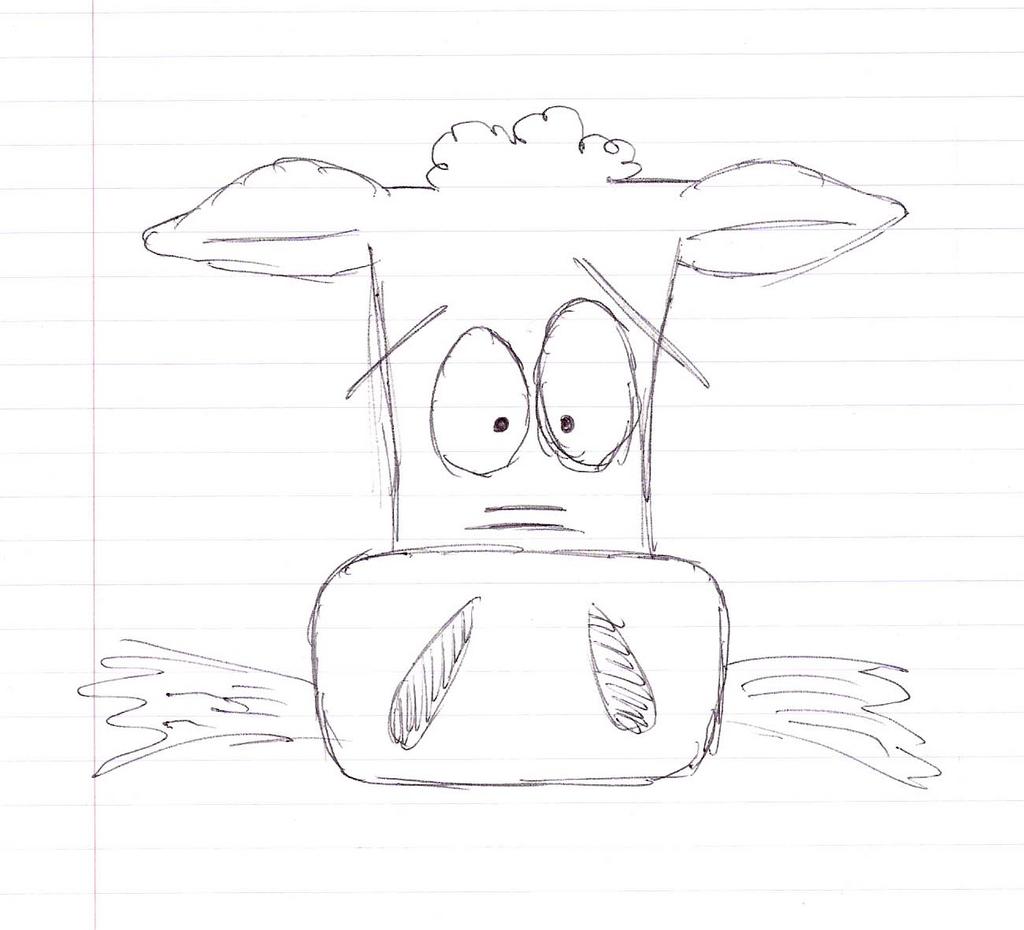
The first thing we want to do is draw something. As you can see below, I've drawn up a cow really quick. One thing you can remember is that you really don't have to do into a lot of detail here. Just a ruff sketch will do. As long as you have the basic shapes and it looks somewhat like you would like it to look when your done, you should be fine. Draw this up on any sheet of paper with pen or pencil, your choice, and then scan it in to your computer. You really don't have to worry about the DPI now because you will be drawing the whole thing over again in photoshop. So just get a copy on your computer.
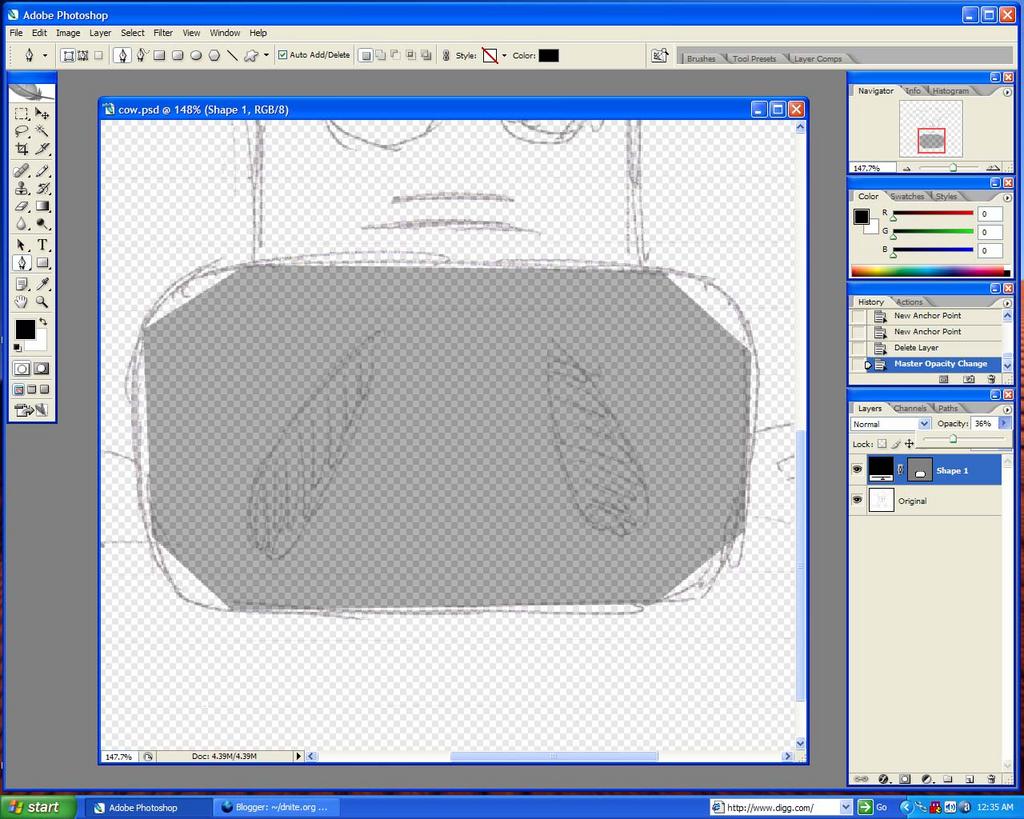
All right. Good job. Now what we're going to do is take that image we just scanned in photoshop and go to the Layer menu, select New..., and select Layer from Background. A dialog should pop up asking you to name the layer and all. You will want to keep your layers organized for this so let's call this layer Original. Also, drop the opacity to about 50%.

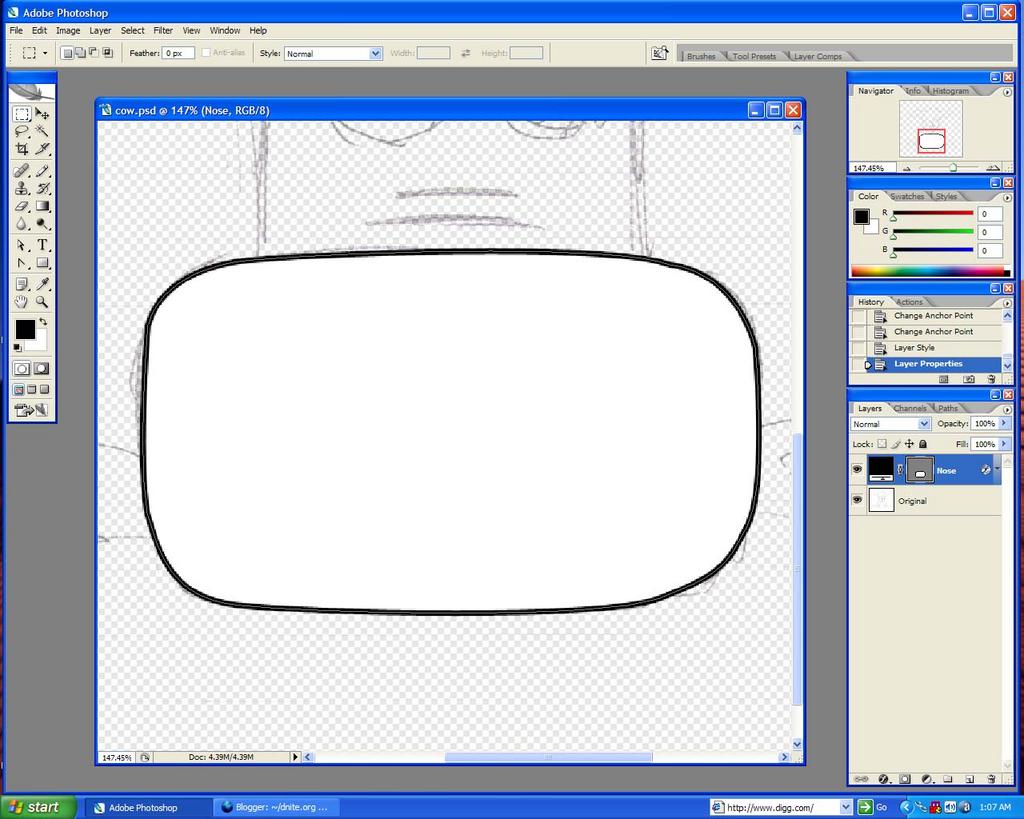
Your scanned image will now be semi transparent. That was quick! It's time to get started making that dull sketch look clean and exciting. We're going to start by tracing the nose. This is a pretty simple shape to start with. You may find other methods of what to trace by experimenting on your own, but I love flexibility so I like to have as many different shapes as possible. We'll zoom in on the nose so it's easy to be precise. Just select the zoom tool and drag a box around it. Now we grab the pen tool and draw a very crude shape around the nose. The pen tool is a very easy to use tool, but takes a little bit of time to get used to. Just click once to drop an anchor point, then rotate around the shape your tracing, clicking where ever you think you might need another anchor. I go clockwise, but either way will work. If you notice, I left all the curves around the edges cut off. We'll take care of this in the next step. Also, make sure you click on the anchor point you started with when your done creating your shape. This will close the shape and if you do no do this, you'll find that you have trouble making curves around those two anchors.
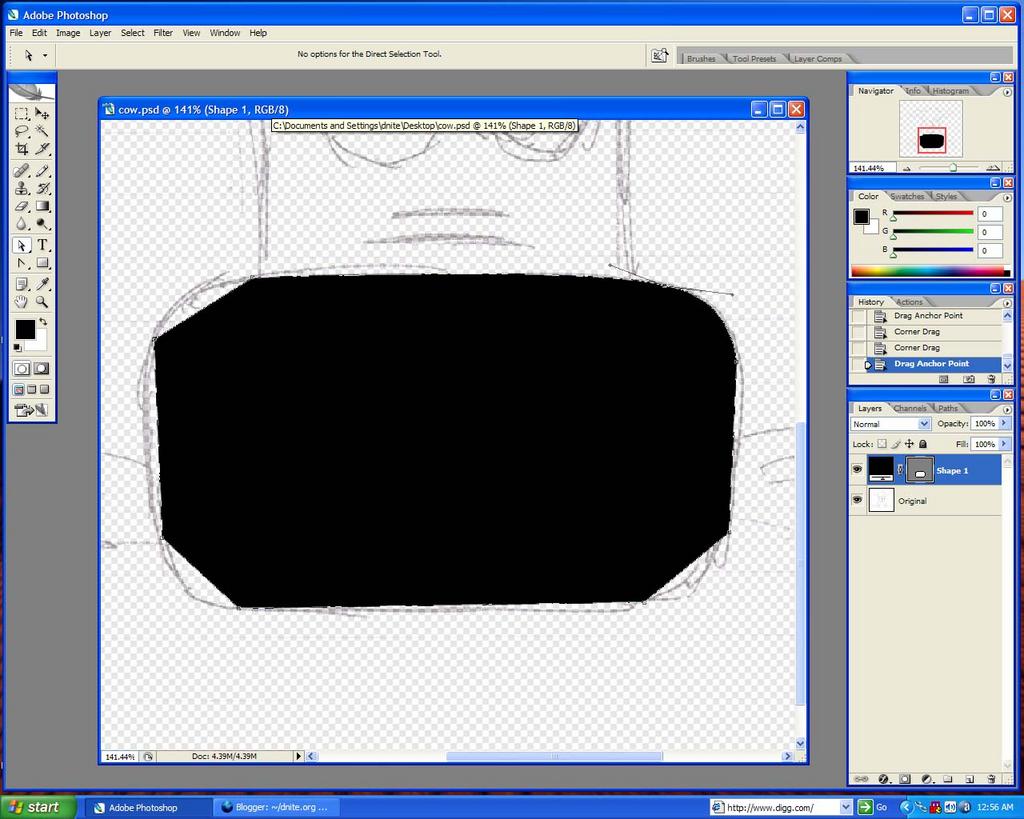
Now that we have started our first shape, let's add some detail. How about rounding those corners. We're going to use the Convert Point tool as well as the direct selection tool for this. This step takes patients depending on what object you are tracing. Hold your left mouse button over the Pen tool to find the Convert Point tool. With this tool selected, we find one of the anchor points and click and drag. What happens here is a long line with a dot on each end starts to form through the anchor point. You may also notice that both of the lines that were touching that anchor point are now changing shape.

Above, things didn't go so well. Looks like the curve went the wrong way. No problem. Take your same Convert Point tool and drag one of the small dots at the ends of the line. You'll notice that it's actually two separate lines and each controls the shape on one side of that anchor point. We'll just play with both of these lines until we have the curve we're looking for. If you happen to need to move the anchor point. DO NOT USE THE CONVERT POINT TOOL. This tool will simply convert the anchor point back normal and remove any curve you made. You'll have to use the Direct Selection tool (located under the Path Selection tool).
Now that looks much closer to what we had drawn. Continue this for the other 3 corners and we end up with something like this.
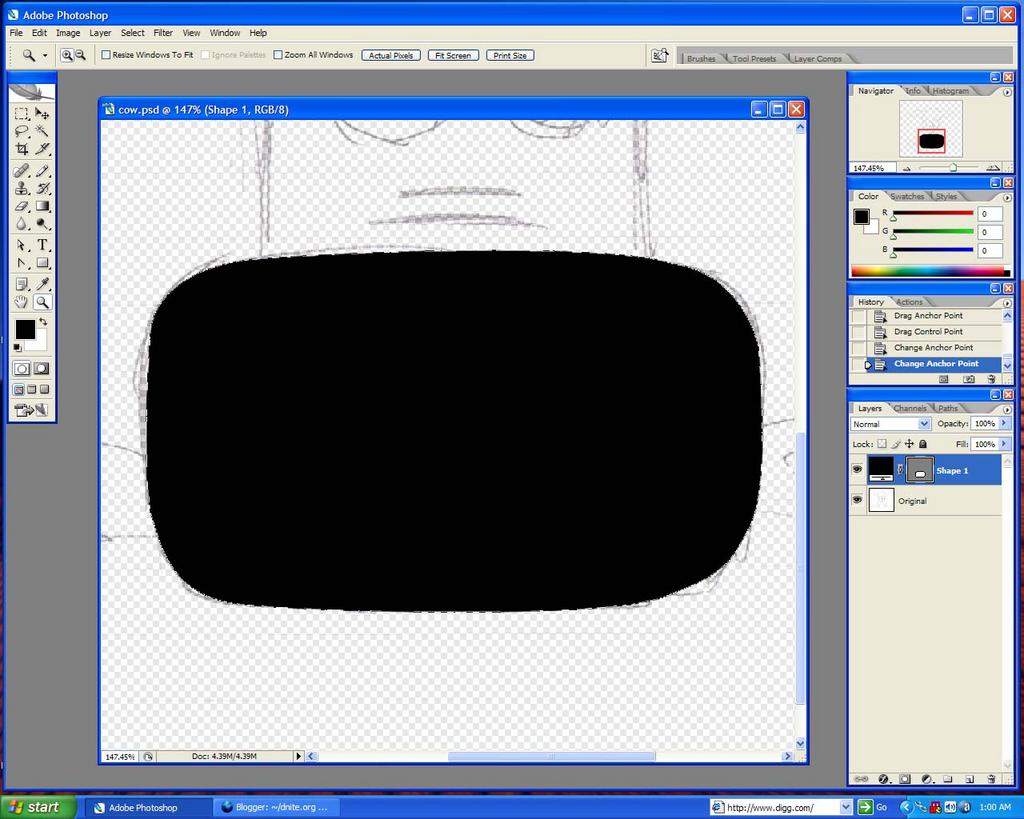
Looks much better. It's not perfect, but that's the great thing about the pen tool. The more time you spend just tweaking here and there, you'll get exactly the shape you want. This will do because I don't have time for perfect. Now there's one big problem. It's just a black square. Photoshop offers a great feature called Layer Styles that should change that. Double click the layer in your layer window and a dialog should pop up with a bunch of options on the left. Let's go simple and just use Stroke and Color Overlay. We're basically going to make this look like a cartoon. Give it a black stroke with a white overlay. Also, use the Center for the stroke alignment as well. Let's rename this layer to Nose as well.

I could go back any time and tweak the nose a little bit. Maybe add an anchor point in the middle of the sides to give him a slightly different shape, or just make the corners a little more perfect. That's up to the artist. The nose is pretty much done though. If you understood that section, you should have no problem finishing. That's pretty much the entire concept. Use the pen tool to start tracing the head next. Just place anchors in various spots (use your own judgment) and then make your curves to shape it exactly like you want with a little bit of time. Below You'll see a me finish a few more shapes. The reason the pen is so great is because of it's flexibility. You can modify the shape whenever you'd like and you can make sure everything looks perfect. Also, because the pen is vector based, you can resize these layers as big or as small as you'd like to without losing any image quality.


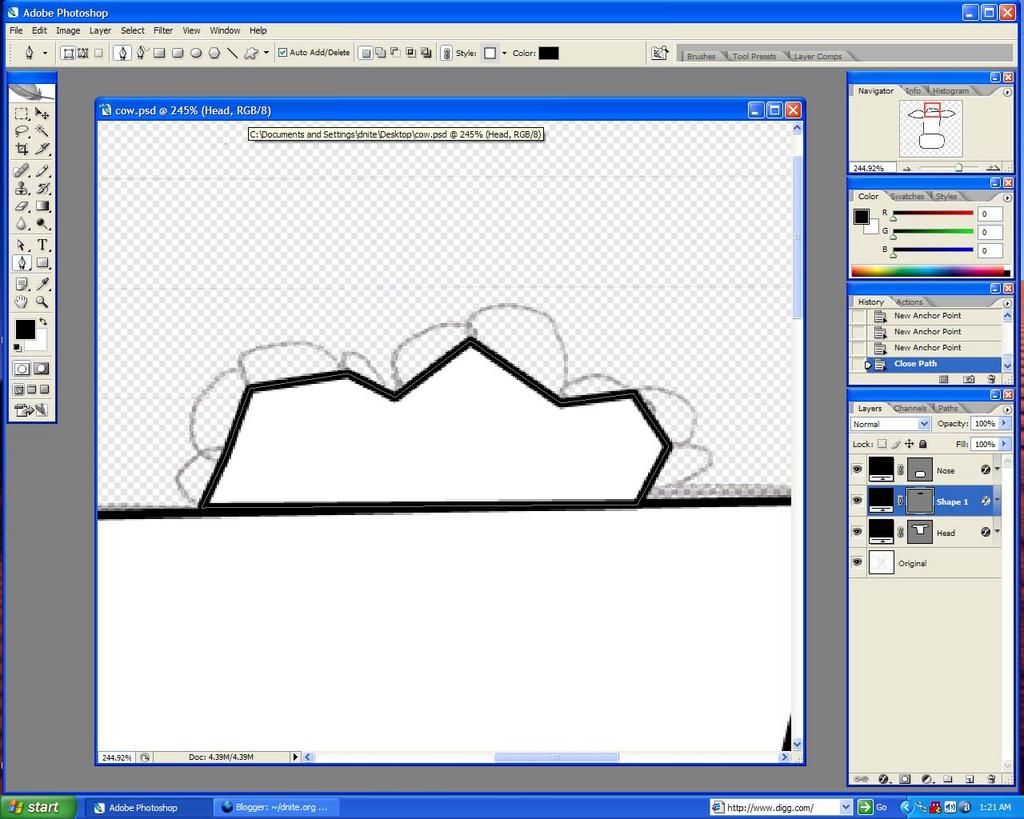
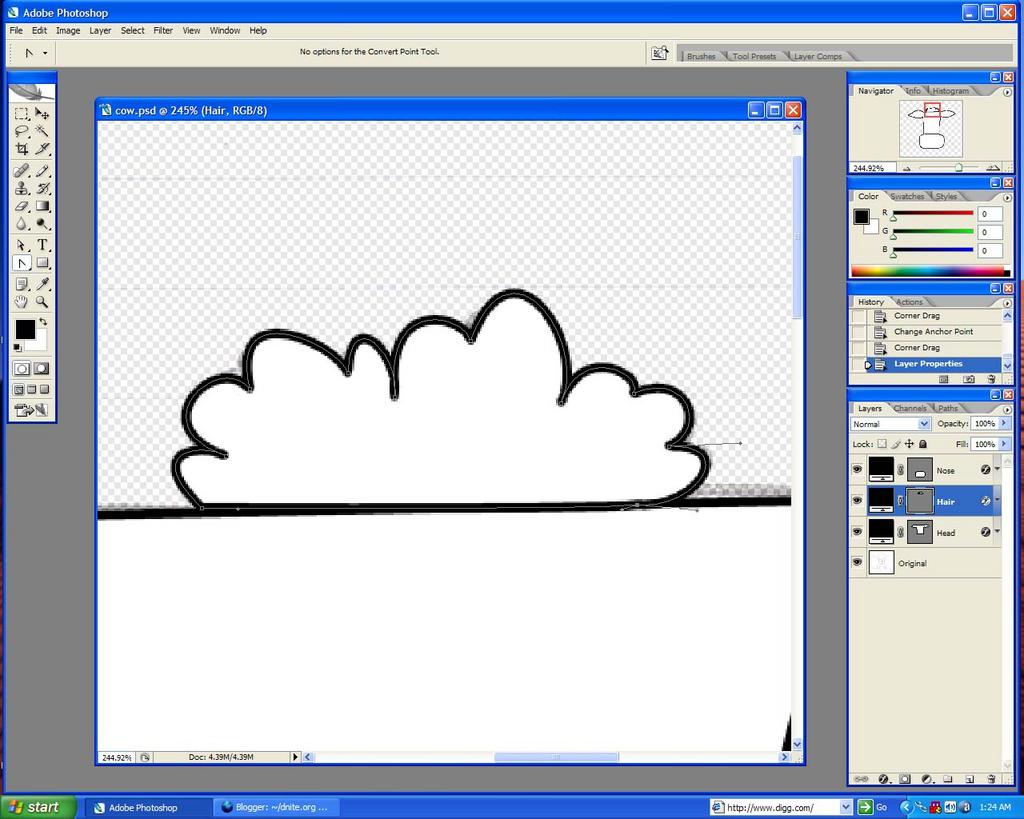
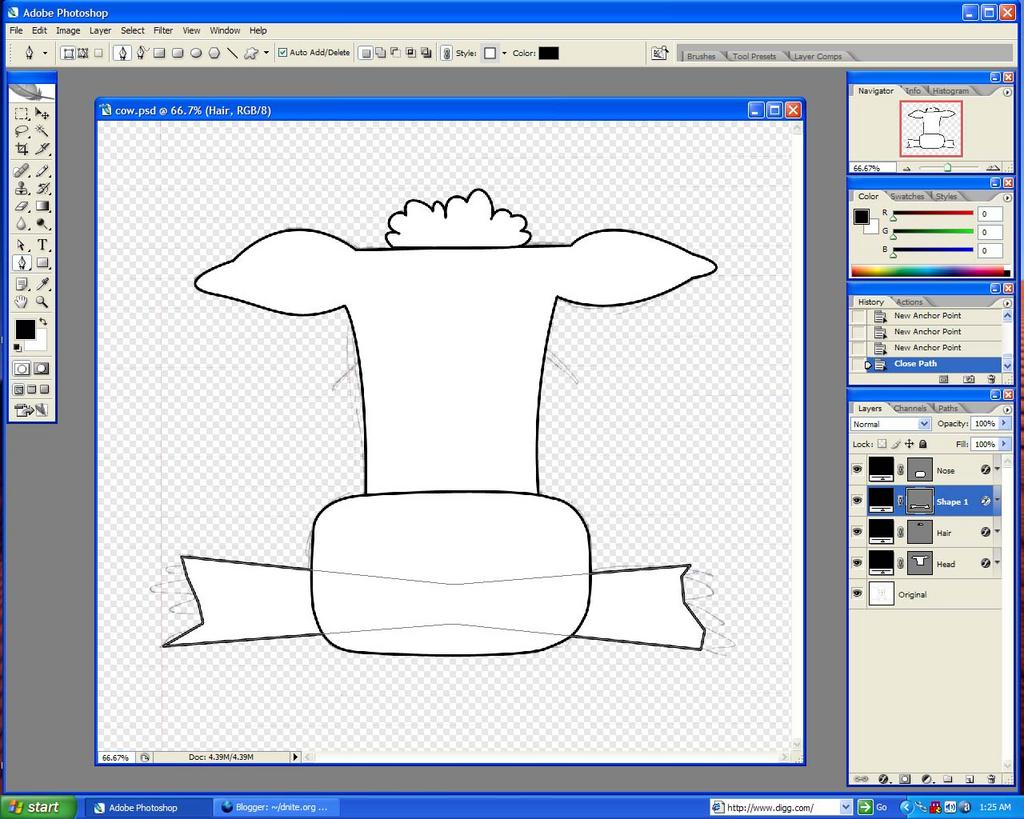

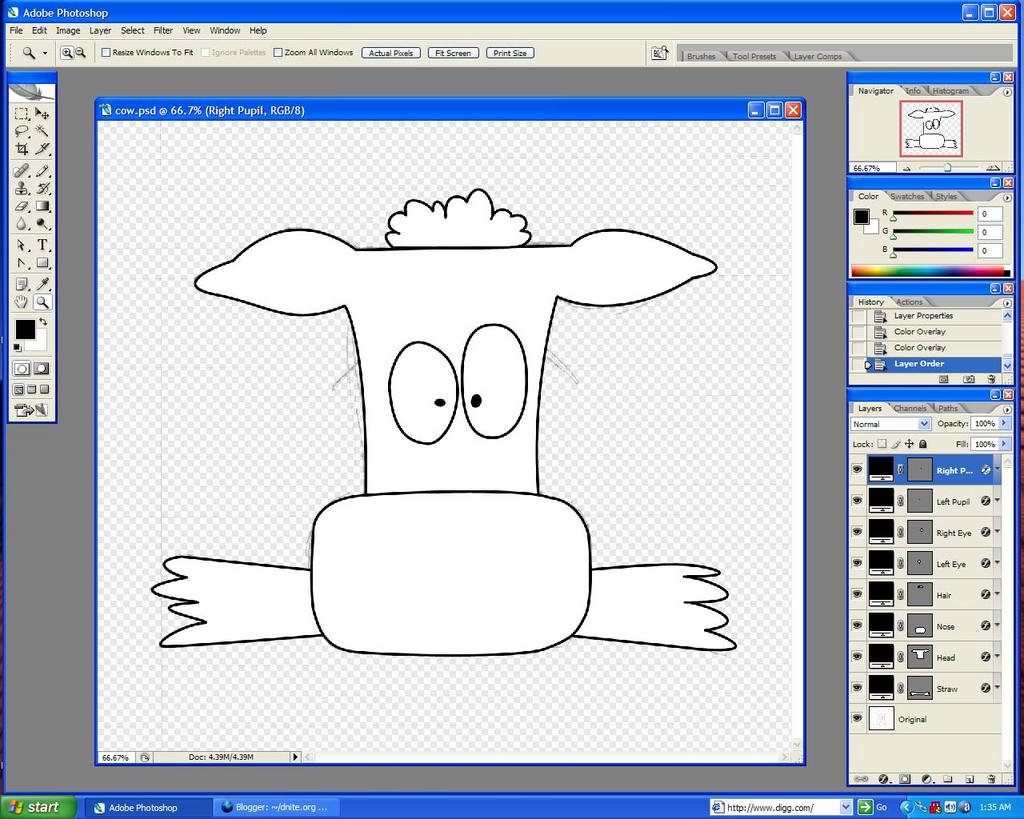
Now we've followed the same steps for the nose to finish shapes for the head, the hair, the eyes, and the hay. Every part of this picture has a shape. This increases your flexibility by allowing your easily to modify colors or other things to individual pieces of the image just by changing the layer style. With Photoshop CS2, there is also a new feature that allows you to group a bunch of layers into one super layer so you can keep everything together. I found this technique to be very useful for making logos and other things that require you to make a resizable image. When your completely done with your object. You may size it to any size you want (as long as you don't flatten the image and get rid of your layers) without losing any quality. This tutorial is more to teach you the concept of using the pen to trace your own drawings. The pen tool takes a little bit of time to get used to and a long time to master, so just play around with it and have fun. You will find that with very little effort you can pull off some pretty neat things with just the pen tool and layer styles.

I hope this tutorial has helped out at least one person in the world. If I find that it has, maybe I'll write another one some day. We'll see. I just hope you enjoyed this.


5 Comments:
How do I convert the Photoshop file in to a SVG file? Any idea?
Thanks for the information.
By Anonymous, at
Monday, August 08, 2005 8:39:00 AM
Anonymous, at
Monday, August 08, 2005 8:39:00 AM
I'm no expert with photoshop, just try and teach myself something cool every once and a while, but I do know that you can export your file in Photoshop to a SWF (Flash) file and then I just found this link that will tell you how to convert flash to SVG. Check it out. Let me know
if it helps. Thanks for stopping by.
Steve.
http://www.dnite.org
By Steve, at
Monday, August 08, 2005 11:54:00 AM
Steve, at
Monday, August 08, 2005 11:54:00 AM
I've always known that the Pen tool was berrer than the magnetic Lasso, But out of hundreds your tutorial is the only one to get me to use it correctly. Thanks a million.
By Anonymous, at
Sunday, March 11, 2007 12:54:00 PM
Anonymous, at
Sunday, March 11, 2007 12:54:00 PM
Thanks so much! Your tutorial really helped me.
By Anonymous, at
Saturday, October 03, 2009 7:58:00 AM
Anonymous, at
Saturday, October 03, 2009 7:58:00 AM
Если вы любитель онлайн казино 2020 года то, вероятно, заметили, что онлайн-казино приобрели популярность в последние годы. [url=https://bbl-company.ru/]товара для ип бесплатно[/url]. Онлайн-казино дает игроку возможность играть во все свои любимые игры дома и вдали от своего компьютера или даже смартфона. На этой странице вы найдете плюсы и минусы онлайн-казино, а также казино в России, которые лицензированы и позволяют вам наслаждаться магией и бонусами казино, не предлагаемыми реальными казино.
By Anonymous, at
Wednesday, March 18, 2020 8:36:00 PM
Anonymous, at
Wednesday, March 18, 2020 8:36:00 PM
Post a Comment
<< Home